
There’s something about banana pudding that instantly takes me back to sunny afternoons, family potlucks, and that sweet, comforting taste of nostalgia.
This creamy banana pudding trifle is my go-to dessert when I want to impress guests and bring that cozy, Southern charm to the table.
Why I Love This Banana Pudding Trifle
No-bake and fuss-free—just mix, layer, chill, and serve!
Light yet indulgent, thanks to the whipped topping and pudding combo.
Make-ahead friendly, perfect for parties or busy days.
Kid-friendly and crowd-pleasing (seriously, it disappears fast!).
Plus, it only needs a handful of simple ingredients that I almost always have on hand.
What You’ll Need (Ingredient Highlights)
Instant Vanilla Pudding Mix (5 oz): Provides the creamy base.
Be sure it’s instant, not cook-and-serve.
Whole Milk (2 cups): Helps the pudding set just right—rich and smooth.
Sweetened Condensed Milk (14 oz): Adds a luxurious sweetness and creamy texture.
Vanilla Extract (2 tsp): Boosts the flavor for that classic homemade taste.
Whipped Topping (8 oz, divided): Adds lightness and fluff—half goes into the pudding, the rest for topping.
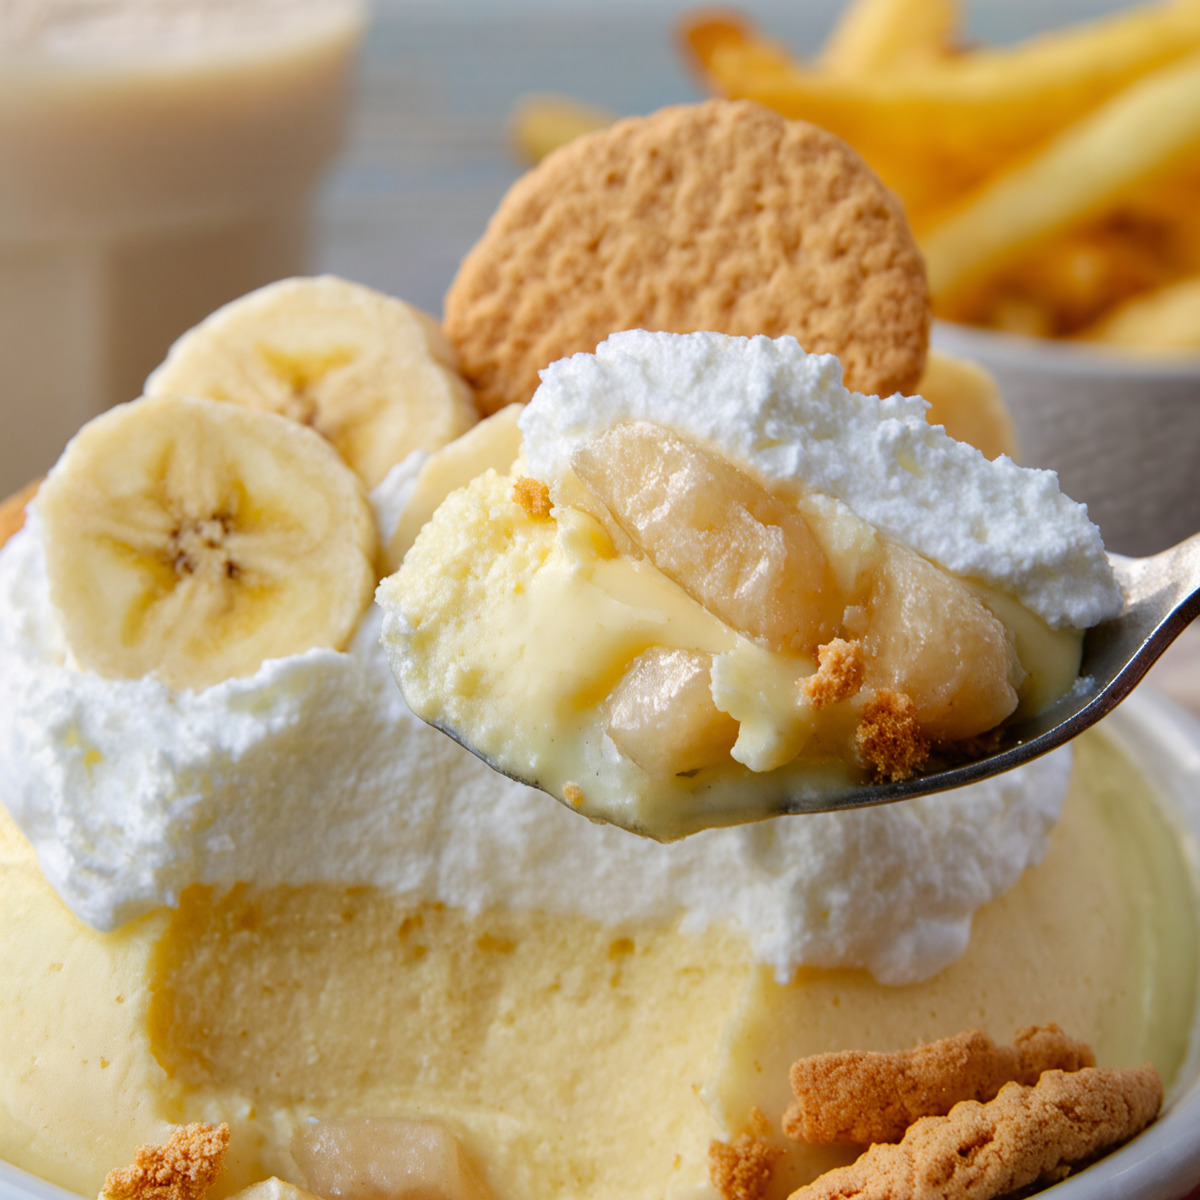
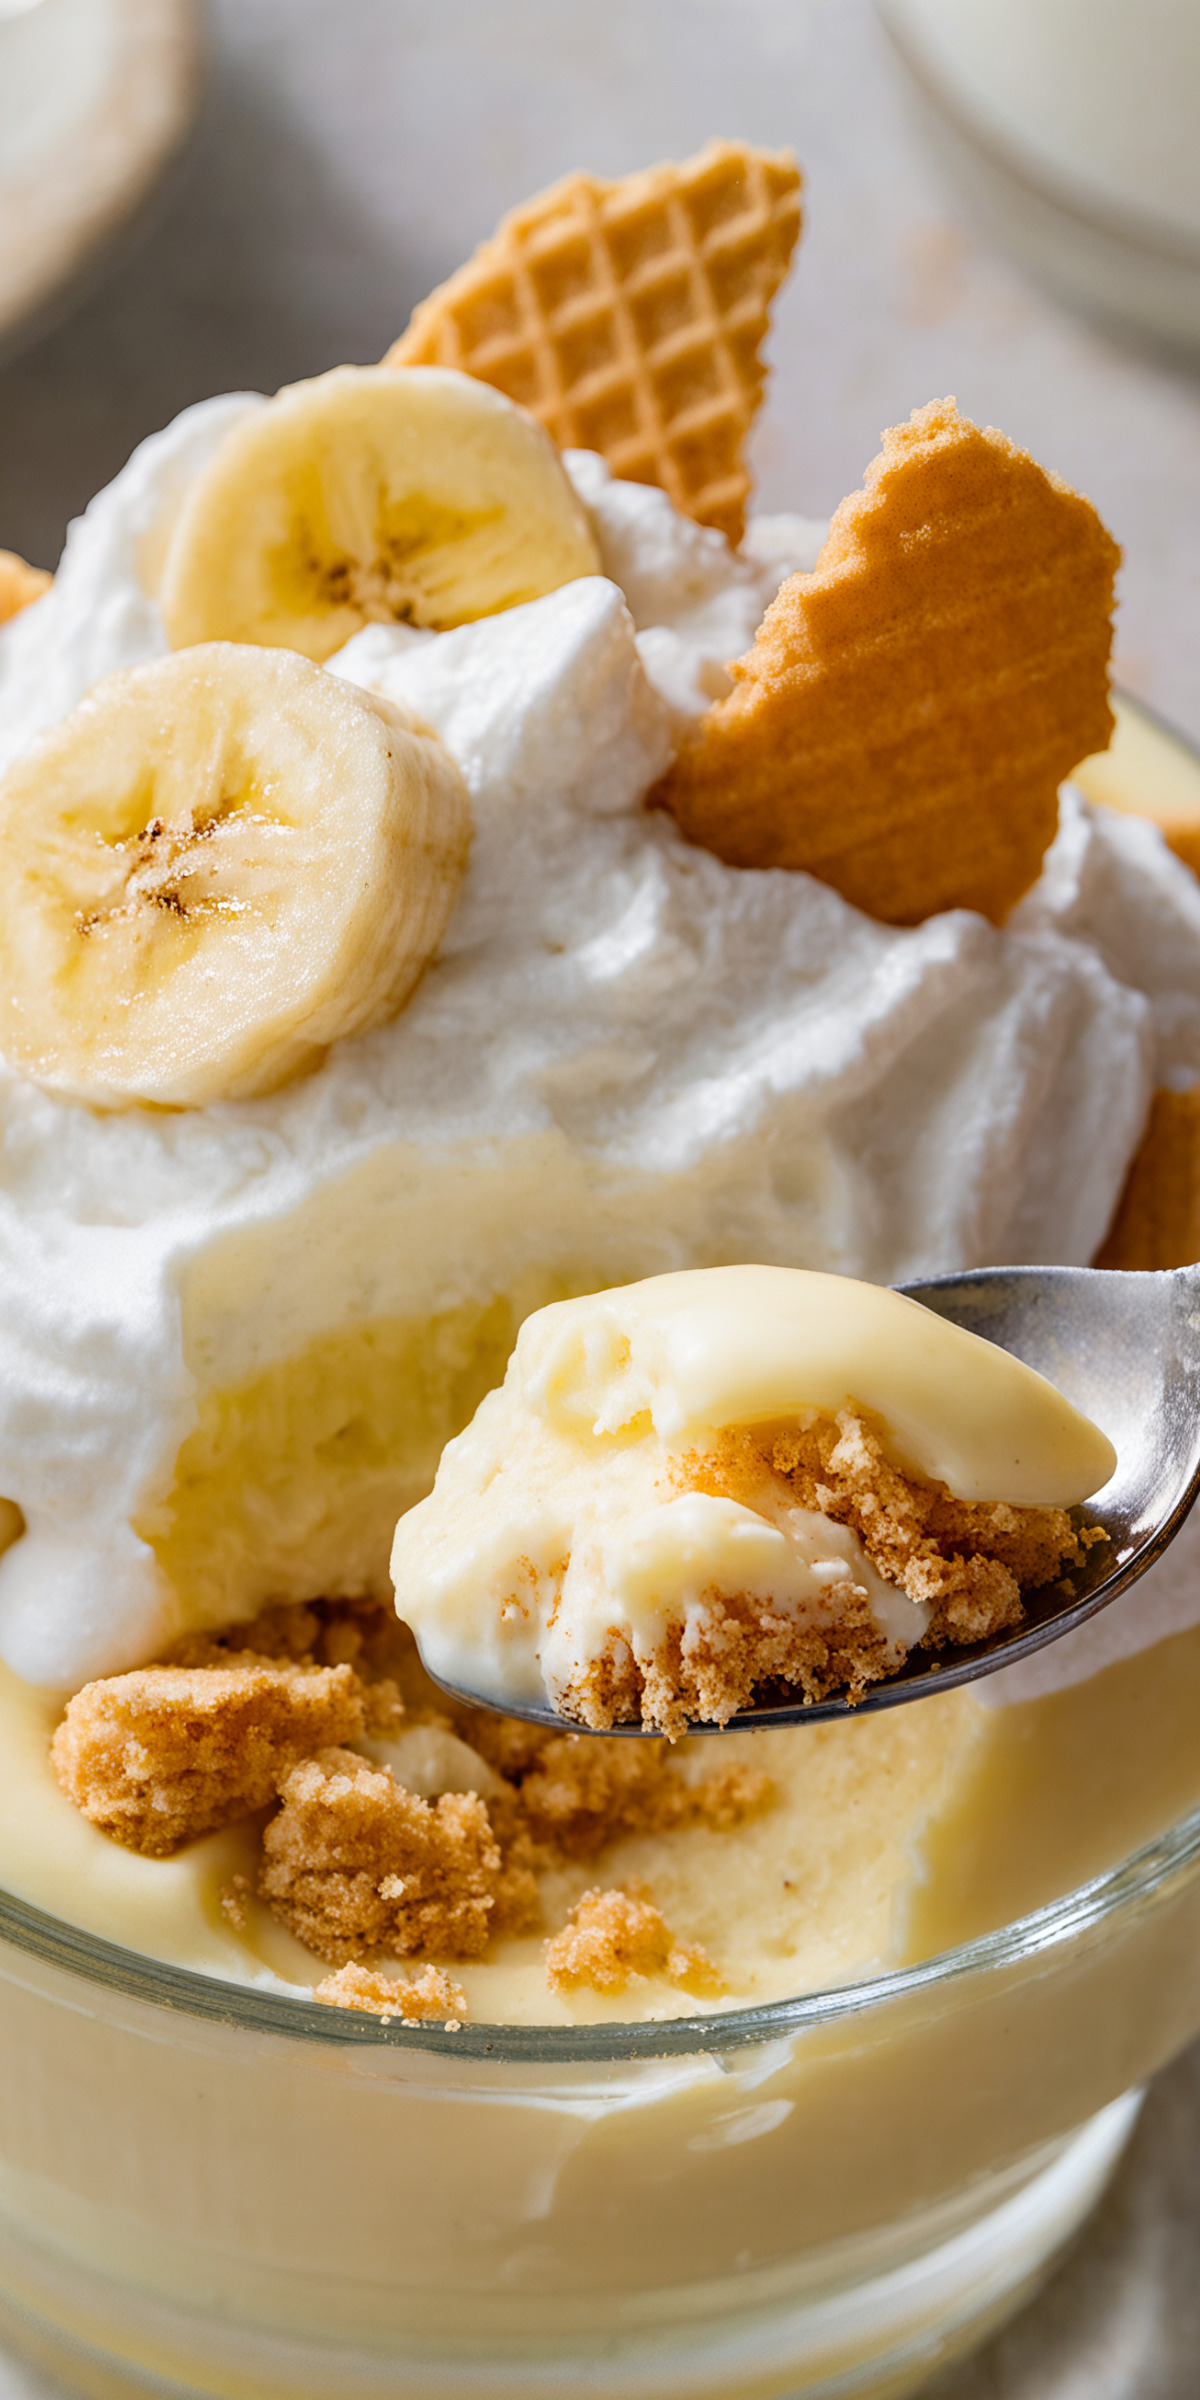
Bananas (4 large): Ripe but not too soft—sweet, creamy, and perfect for layering.
Vanilla Wafers (12 oz box): Provide that iconic texture contrast—softening slightly as they chill but staying intact.
Pro Tips Before You Start
Use cold milk when mixing the pudding for best results.
Chill the pudding mix for at least 30 minutes before layering—it makes it much easier to handle.
Choose ripe but firm bananas to avoid mushiness in your trifle.
Let the whole trifle rest in the fridge for a few hours (or overnight) so the flavors meld beautifully.
How to Make Banana Pudding Trifle
Step 1: Make the Vanilla Pudding Base
In a large mixing bowl, whisk together the instant vanilla pudding, whole milk, and sweetened condensed milk until smooth and creamy.
Add the vanilla extract and stir until fully combined.
Cover the bowl and refrigerate the mixture for about 30 minutes to let it thicken.
Step 2: Fold in the Whipped Topping
Once the pudding has set, gently fold in half of the thawed whipped topping using a rubber spatula.
This creates an extra airy texture.
Step 3: Prep the Bananas
Peel and slice the bananas into even ½-inch rounds.
Set them aside so they’re ready to layer.
Step 4: Layer the Trifle
Grab a clear trifle dish or a deep glass bowl (so you can see the layers!).
Start with a base layer of vanilla wafers.
Add a layer of banana slices. Spoon over one-third of the pudding mixture.
Repeat the layering twice more—wafers, bananas, pudding—ending with pudding on top.
Step 5: Chill the Trifle
Cover the dish and refrigerate for at least 2 hours—longer if you can.
This allows the flavors to marry and the wafers to soften just enough.
Step 6: Serve with Flair
Right before serving, top the trifle with the remaining whipped topping.
Garnish with extra banana slices and crushed vanilla wafers if desired.
Scoop generously and enjoy every spoonful!
What to Serve It With
This banana pudding trifle pairs wonderfully with:
A hot cup of coffee or espresso for contrast.
Fresh berries on the side for added color.
A drizzle of caramel or a sprinkle of cinnamon for an extra twist.
Variations / Substitutions
Make it lighter: Use low-fat milk and light whipped topping.
No whipped topping? Fold in homemade whipped cream.
Add texture: Mix in crushed nuts or chocolate chips between the layers.
Change the pudding flavor: Swap vanilla for banana or even white chocolate pudding for a fun twist.
Storage & Leftovers
Store covered in the fridge for up to 3 days.
The wafers will continue to soften over time, so it’s best enjoyed within the first 48 hours.
Avoid freezing, as the texture won’t hold up well once thawed.
FAQs
Can I make this trifle ahead of time?
Yes! It’s actually best when made several hours or even a day ahead to let the flavors develop.
What type of bananas work best?
Use ripe bananas that are yellow with just a few brown spots.
Overripe bananas may become too mushy.
Can I use homemade pudding instead of instant?
Definitely! Just be sure it’s fully cooled before layering.
How do I prevent the bananas from browning?
You can toss them lightly in lemon juice, but keep in mind it may slightly alter the flavor.
Can I make this dairy-free?
Yes—use dairy-free pudding mix, almond or oat milk, and coconut whipped topping.
Do I have to use a trifle dish?
Not at all! Any large glass or ceramic bowl will work, even a 9×13-inch baking dish.
Can I add a crunchy topping?
Absolutely! Crushed graham crackers, chopped pecans, or even toffee bits add a great crunch.
Final Thoughts
This banana pudding trifle is everything I love in a dessert—comforting, beautiful, and easy to make.
Each layer offers a bit of nostalgia and joy, whether you’re sharing it at a family gathering or sneaking a spoonful straight from the fridge.
Once you make it, I promise it’ll earn a permanent spot in your dessert rotation. Happy layering!

Creamy Banana Pudding Trifle
Ingredients
Method
- In a large mixing bowl, whisk vanilla pudding, milk, and sweetened condensed milk together.
- Stir in the vanilla extract.
- Cover and refrigerate for 30 minutes.
- Once chilled, gently fold half of the whipped topping into the pudding mix.
- Slice bananas into ½-inch rounds and keep nearby.
- In a trifle dish or large bowl, layer vanilla wafers, banana slices, and ⅓ of the pudding.
- See full steps with tips & photos → https://theboatshedcafe.com/creamy-banana-pudding-trifle-2/
Notes
- For best flavor, use ripe but firm bananas to avoid mushiness.
- You can make this dessert up to 24 hours ahead—it gets even better after resting.
- Serve with a long spoon to get every beautiful layer in each scoop!