
I still remember the first time I made banana pudding jars for a weekend get-together.
They weren’t just cute—they were the first dessert gone!
The smooth vanilla pudding, layered with bananas and crisp vanilla wafers, all in a single jar… it’s comfort food in its prettiest form.
Whether you’re hosting brunch or just craving a nostalgic bite, these little jars deliver joy in every spoonful.
Why You’ll Love This Recipe
What makes banana pudding jars so special is how they bring classic Southern flavors into an easy, make-ahead dessert.
The homemade vanilla pudding is rich and creamy, the bananas stay fresh thanks to the layering, and the whipped cream adds that light, dreamy finish.
Plus, these jars are perfect for parties—no slicing, no serving mess. Just grab and enjoy!
What You’ll Need (Ingredient Highlights)
Vanilla wafers – They soften slightly from the pudding, becoming almost cake-like.
Ripe bananas – Choose ones that are yellow with minimal browning for best flavor.
Homemade pudding – A rich blend of milk, egg yolks, cream cheese, and vanilla.
Whipped cream – Light and fluffy topping that balances the rich layers.
Pro Tips Before You Start
Temper the eggs properly: Slowly whisk in the hot pudding to avoid scrambling them.
Use room temp cream cheese: It blends more easily for a smooth pudding.
Assemble close to serving time: While you can prep ahead, bananas are best fresh.
Chill before serving: At least 2 hours for the flavors to set and meld.
How to Make Banana Pudding Jars
Step 1: Make the Pudding (Shortened Version)
In a saucepan, whisk sugar, flour, and milk over medium heat until thick and bubbling.
Cook 2 more minutes, then remove from heat.
Whisk egg yolks in a bowl, slowly add 1 cup of the hot mixture to temper.
Pour back into the pan, whisking constantly. C
ook until it begins to bubble. Stir in butter, cream cheese, and vanilla until smooth.
ransfer to a bowl, cover with plastic wrap (touching the surface), and chill until set.
Step 2: Whip the Cream
In a clean bowl, pour 1 cup of heavy cream and add 1 teaspoon of sugar.
Using a hand mixer or whisk, beat until stiff peaks form. Chill until ready to use.
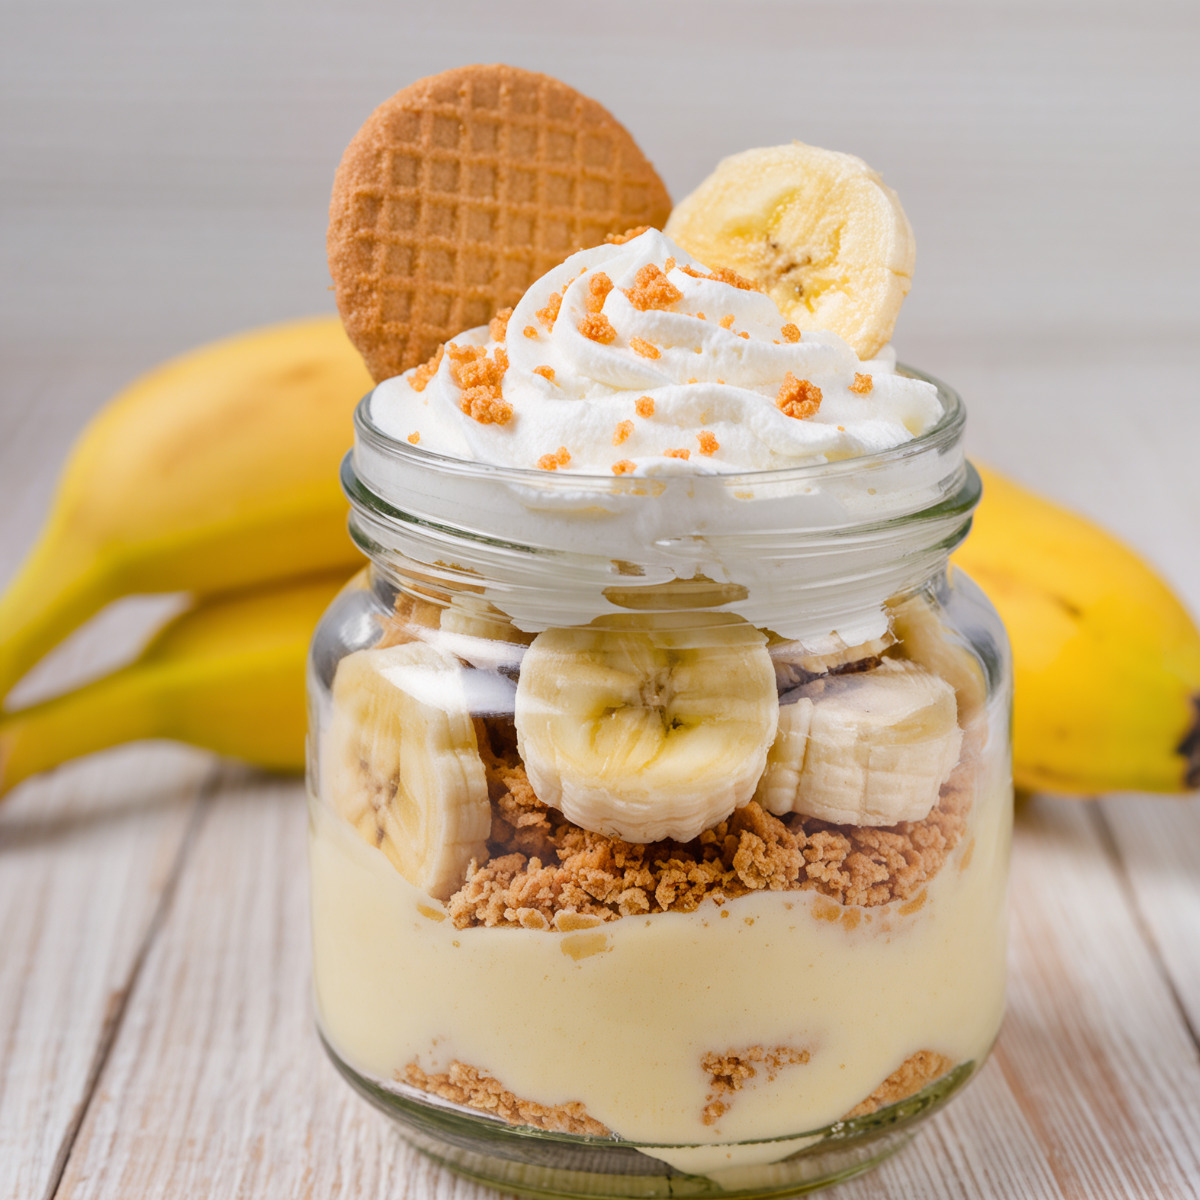
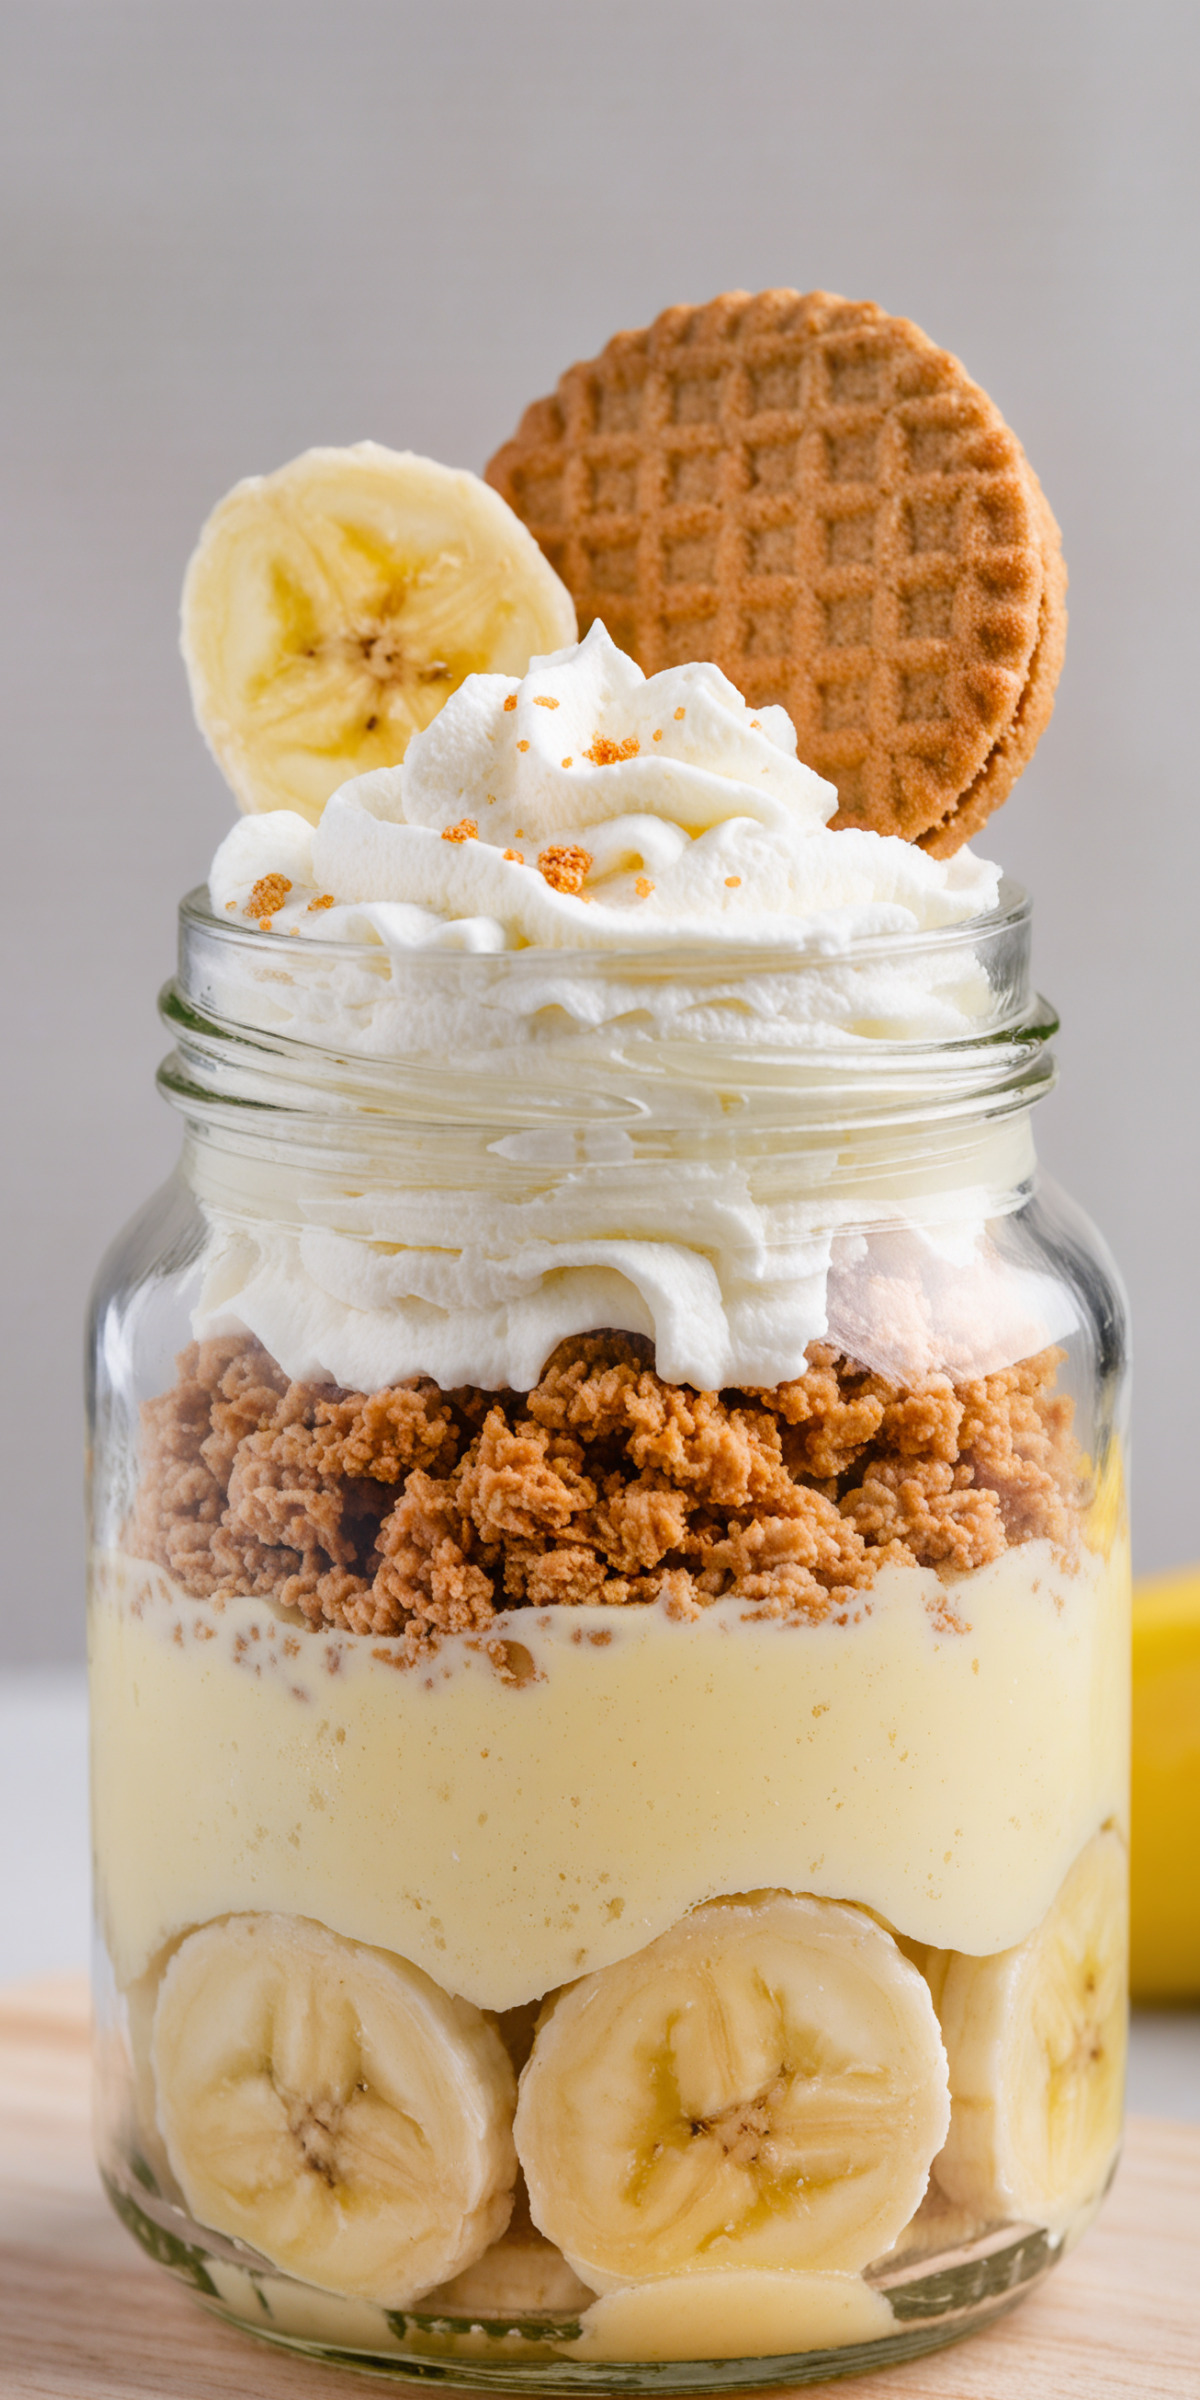
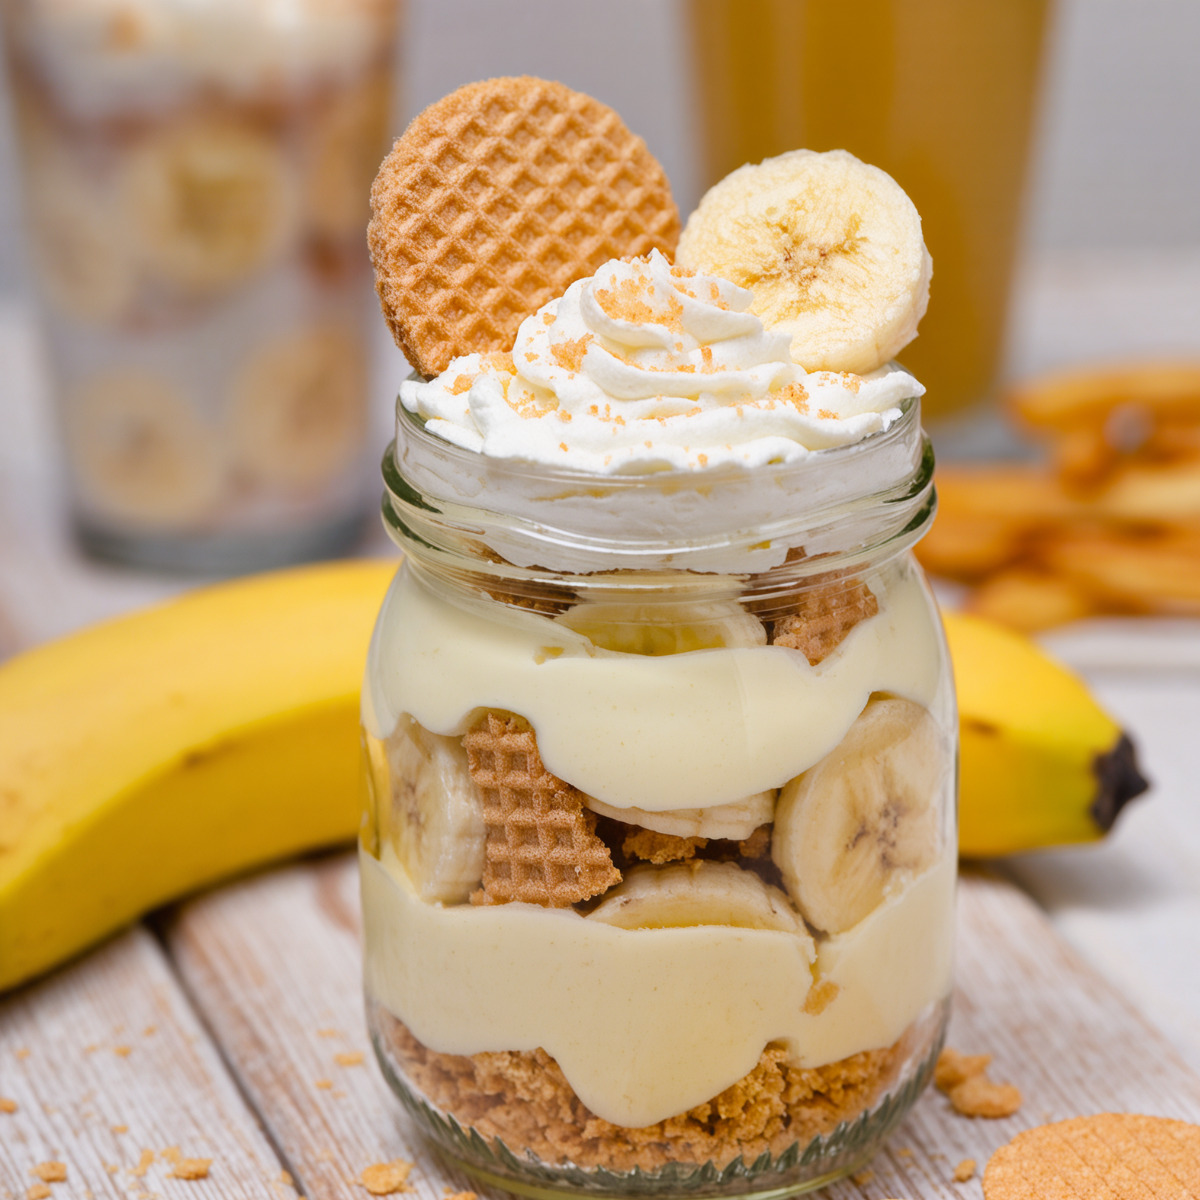
Step 3: Assemble the Jars
Roughly crush vanilla wafers and divide them among 6 mason jars as the bottom layer.
Slice your bananas and add 4–5 slices to each jar over the wafers.
Spoon a few tablespoons of the chilled pudding over the bananas.
Repeat the layers—vanilla wafers, banana slices, pudding—until jars are nearly full.
Top each jar with a generous dollop of whipped cream.
Garnish with extra banana slices, a whole wafer, or some wafer crumbs for texture and charm.
What to Serve It With
A cup of hot coffee or sweet tea.
Summer BBQ dishes as a refreshing finish.
Light brunches with fresh fruit and muffins.
Variations / Substitutions
Gluten-free: Use gluten-free vanilla wafers or graham crackers.
Lighter version: Swap cream cheese for Greek yogurt and use low-fat milk.
Caramel twist: Drizzle salted caramel between layers.
Add crunch: Top with crushed pecans or candied walnuts.
Storage & Leftovers
Store your banana pudding jars covered and refrigerated for up to 2 days.
After that, the bananas may start to brown and the wafers will soften too much.
If making ahead, assemble all layers except the top bananas and whipped cream.
Add those right before serving for best texture.
FAQs
Can I make banana pudding jars a day in advance?
Yes! Assemble them the night before, but wait to add the whipped cream topping and garnish until just before serving.
How do I keep the bananas from browning?
You can toss banana slices lightly in lemon juice or assemble the jars just before serving for the freshest look.
Can I use boxed pudding instead of homemade?
You can, but the homemade version is much creamier and richer in flavor.
Do the jars need to be chilled before serving?
Yes, chilling for at least 2 hours helps set the pudding and lets the flavors blend beautifully.
What size jars should I use?
Use 6 small 6–8 oz mason jars for individual portions, or layer everything into one 8×8 dish.
Can I freeze banana pudding jars?
Freezing isn’t recommended because the texture of the bananas and pudding will change.
Is it okay to skip the cream cheese?
You can, but it adds a subtle tang and creaminess that balances the sweetness perfectly.
Final Thoughts
These banana pudding jars are everything I want in a dessert—creamy, nostalgic, and completely irresistible.
They’re fun to assemble, easy to serve, and even easier to devour.
The combination of velvety pudding, fresh banana slices, softening vanilla wafers, and that airy whipped cream topping?
It’s honestly the bite-sized Southern dessert I’ll never stop loving.
Banana Pudding Jars
Ingredients
Method
- In a saucepan, combine sugar, flour, and milk.
- Cook over medium heat, stirring, until thick and bubbly.
- Continue cooking and stirring for 2 more minutes. Remove from heat.
- Beat egg yolks in a small bowl. Slowly whisk in 1 cup of hot pudding to temper.
- Return the egg mixture to the pan, stirring constantly.
- Cook until it begins to bubble again.
- See full steps with tips & photos → https://theboatshedcafe.com/banana-pudding-jars/
Notes
- Use firm, ripe bananas for best texture.
- If prepping ahead, add bananas right before serving to avoid browning.
- For extra flavor, lightly toast the wafers before layering.
 My name is Isabella, and this space was born from years of stirring sauces at sunset, baking cookies while the kids played on the porch, and finding comfort in a homemade meal after long, busy days. Here you’ll find delicious, reliable recipes made with simple ingredients, plus easy step-by-step photos and videos to help you cook confidently at home.